- Gather some laminate samples - you can buy these on eBay, or visit your local home building shop such as Lowe's or Home Depot and see if they have any old or extras they would allow you to have. They come in a smaller size or a larger size - I used the smaller ones for this project.
- Gather some special papers to use as backgrounds on the cards, and cut out some text from old vintage books - anything goes as far as collaging. Text backgrounds work especially well because the effect shows through after you color them.
- Paint the cards with some gel medium (my favorite adhesive) in thin layers and collage the fancy papers. Let dry. Then collage little strips of text or book page snippets.
- Allow to dry thoroughly, then cut as close to the edges of the cards as possible, or even sand off the edges of the paper for a more distressed effect.
- Punch holes in the collaged papers where the hole in the card is - to allow you to string them onto a metal ring later.
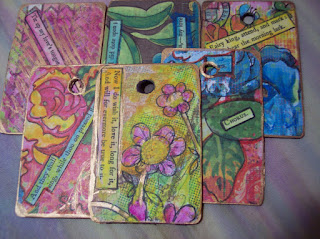
- Grab your sharpies, watercolors, acrylic paints, watercolor crayons, or even stamp over with ink pads - the more layers of color the better. I outlined some of the paper designs in thin sharpie, then scribbled with watercolor crayons to fill in areas with color. Then, I added a little bit of water with a small paintbrush to create a washed effect.
- Edge with a metallic paint pen (Krylon pens work well) around the edges and around the edges of the hole for a finished look.
- Wrap with pretty fibers, little pieces of favorite trim, whatever you want to organize on the cards.
- Loop through with a large metal ring - I like the colored ones, or you could try using alcohol ink on a plain silver one (I wish I had done that!)
Here are some photos of the finished cards - I'd love to see some of yours too! : )


No comments:
Post a Comment
Thank you for your comments! I unfortunately have to review them first before they can be posted (to avoid spam for everyone!)
Thank you so much for your interest in my crafty goings-on! : )