September 18, 2010

Color Palette Challenge - Cream, Olive, and Rust

My friend Rosanna asked me to create a special art journal for her friend's birthday. Rosanna already had an art journal I had made using the silk sari ribbon, frayed and sewn in rows in layers with beading - for her friend she wanted something similar but with a completely different color scheme. I gravitate towards bright colors - and a lot of them! - so it was a real creative challenge for me to use a specified set of colors, but it really inspired me to begin thinking more about the colors I don't normally use. The more I worked with this color set, the more I liked it! Plus, it feels very "fall" - and fall is definitely here in Michigan. I'm happy with how this turned out - and I'm already thinking of ways to incorporate these colors into my other pieces - I love the sophisticated effect they have!

I rummaged through my fabrics and supplies, and discovered that I didn't really have very many materials to work with in this color range - I had a LOT of of fun shopping and picking up some fresh new fabrics and beads - here are the supplies I ended up working from. I share these photos because maybe now this color palette will inspire someone else as well! : )


Last but not least, the silk sari ribbons! : )


Here is the finished art journal:

Front Cover - Layered Silk Sari Ribbon stitched in rows, embellished with beading, along with black stamped letters on canvas - all layered onto a colorful batik, then candlelight silk dupioni, and an olive/cream foliage themed batik background.


Ribbons on spine laced through grommets inset in the spine, which not only looks pretty but is functional too as it anchors the inner rings which hold the inside pages.


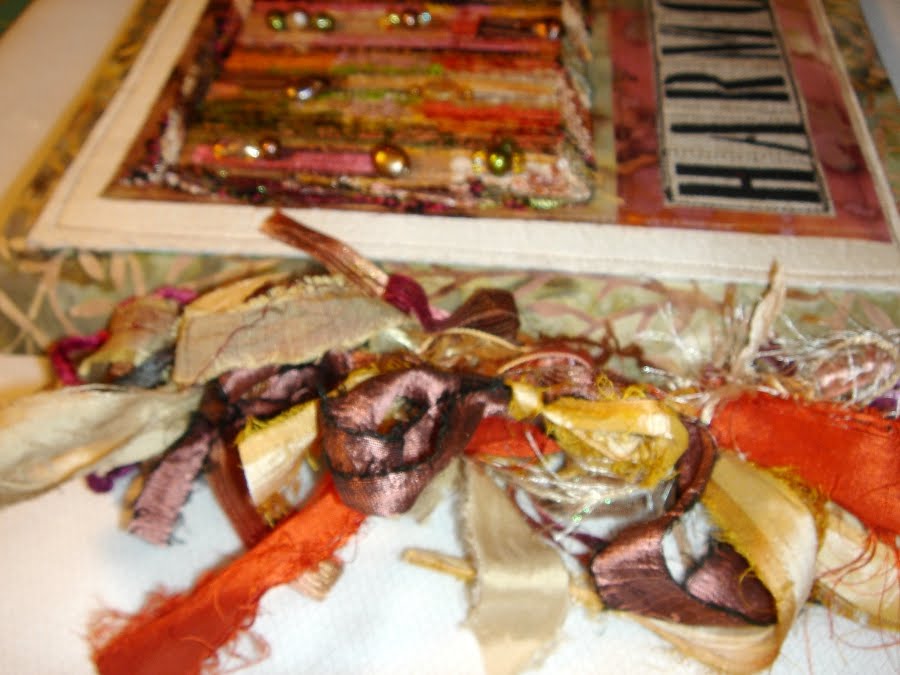
Close-up view of the silk sari ribbon panel - it was difficult to choose which beads to use, because I love them all! : )


Inside front cover - customized label.


Inside pages - a "variety pack" of special papers, including handmade, vellum, metallic inclusion, botanical inclusion, foiled, stamped, glassine envelopes, and handmade paper.


My art journals are available for custom order at:

~ Embrace the colors of fall! ~

Final Photographs - "Enchanted Forest"

My past few posts have been about an art quilt I have been making for the past couple of months. It is a HUGE triptych form art quilt, with a midnight blue swirly tree (silhouette effect), a sunrise sky, and lots of little "characters" including birds, butterflies, dragonflies, flowers, and even a little frog. It has been an absolute joy to work on this quilt, for my friend in Australia. She is so wonderful - and I wanted this quilt to be amazing for her. A couple of months in the making - this quilt has evolved from a rough crayon sketch to my best piece of work ever - I'm so proud!!
My whole family got involved in the final photography of this quilt - we wanted to capture it fully before I sent it overseas. (Thank you to everyone who helped!!)

Here are the final photographs:

First, here is a photo of the piece hanging above a queen-sized bed, to help see the scale of this quilt - it is very large, measuring a total of 58" wide by 30" tall (divided into two smaller outside pieces and one larger middle piece).


Here is a view of the entire quilt, with a black background:


Last, here are a few detail shots:

(see my previous postings to see how I created the birds!)


(I love how the bottom bird seems to be looking up at the bird on the top branch - reminds me of my daughters somehow ; )

Ground cluster work - created with bits and pieces of green variegated boucle yarn, confetti fabric, fussy-cut commercially printed fabrics (VanGogh's Iris Flowers), all stitched beneath water soluble stabilizer. Once the stabilizer was washed away, I did additional stitching and overstitching, and also used fabric dye pens to highlight and shade areas of color. Very fun technique!!


I'm really pleased with how this turned out - and I'm so happy this piece is going to someone as delightful as my friend in Australia. This project really stretched me creatively and provided a wonderful challenge - I learned a LOT and I just can't wait for her to receive her package in the mail!! : )

September 8, 2010

More progress on an art quilt!

I have been working on an art quilt for my friend Linda in Australia - as seen in my previous post.
We decided to add a groundline, with clusters of grass and foliage with iris flowers and some small pink flowers - and we've added several more birds, butterflies, and even a little hummingbird and frog!
Becuase the initial layer was already complete, I added this new foreground layer by laying on the small fabric pieces, and the cut out blooms (fussy cut from quilting fabric printed with VanGogh's paintings), and adhered by laying water soluble stabilizer, which was then stitched (extremely densely) with clear thread to make sure all of the little pieces were secure. Then I washed away the stabilizer - let the quilt dry, and begain coloring over this layer with some fabric dye markers and touches of Shiva Paint Sticks. I'm so proud of how it has turned out!!
At this point, we just need to finish up the stitching on the frog, lillypads and water plants, as they are not yet secured to the quilt (I'm waiting to see what Linda thinks of them!) - and then do a bit more stitching for outlining and shading on the additional birds, butterflies, and flowers. How many birds can you count? : )
After those are completed, we can put on the backing fabric with hanging sleeves and binding!
I'm so happy with how this is turning out - Linda's initial vision for an "enchanted forest" is coming true!
The next photos will be the *final* photos - I can't wait to share!

Left Side:


Right Side:


Iris Closeup:


Birds and butterflies in upper left side of the quilts - (still needs more stitching):


Closeup of the flowers, bottom left beneath the birds (this is on a seamline, there will be narrow black binding around all 3 pieces of this quilt):


Final photos coming soon! : )