Showing posts with label Color. Show all posts

April 1, 2011

FREE DRAWING!!

In honor of warmer weather coming - I'm hosting a fun little drawing for some GOODIES, in hopes of inspiring everyone to include a little more GREEN in their projects : )

Win one of my specialty fiber bundles,
in the colorway "GREEN!"

These fiber bundles are also available in my etsy store (and in MANY different colors!!) at:

This batch of fibers contains 2 generous yards each of 15+ different fibers.


HERE'S HOW TO WIN!!

Create a new project - big or small, featuring the color GREEN!

***Please email your NAME and EMAIL along with ONE (1) photograph of your project to:  heather3stars@yahoo.com

I will post ALL entries on my blog using FIRST NAME and photograph (unless you specify in your email that you would NOT like me to share your project on my blog).  If you'd like additional contact information (such as your etsy store, blog, etc) added, please indicate that as well - I'm happy to post it for you : )

The winner of the drawing will receive notification from me on May 5th, 2011, at which point I'll need the shipping address to send the fibers to.


Be creative - have fun -
think "GREEN" -
and share your photographs with all of us!!


~ GOOD LUCK!! ~


Hydrangea Pillow - version 2

The other day I finished up an art pillow, using the "confetti" technique - this one features hydrangeas which is similar to one I created before, with a new twist: FOLIAGE!!
I decided that hydrangeas really do have leaves, contrary to MOST depictions -
and it was really fun to see the colors come alive when the green was added!

Before: (version 1)


After: (version 2!)


Closeup of one of the leaves:


Also on this version #2, I added a little flower adornment - it features a vintage-style metal and rhinestone bloom-shaped center, with layers of the different fabrics I used in the actual pillow cover - plus, a very special hand-dyed vintage lace piece (variegated greens).

I kind of like the green! That could be because the warmer weather is finally coming - I think I have "Spring Fever!" We just moved to a new house (after living in a 3rd floor apartment for years and years!), and there are baby sprouts of green coming up everywhere in the gardens - I'm so excited to see them popping out of the ground!!  I can't wait to see what kind of plants they really are!! I feel a bit like the "Little Prince" waiting for his rose to be revealed - I'm so lucky to have plants and flowers again - it's great, great fun : )


~~~~~~~~~~~~~~~~~~~~~~~~~

So, my "tip of the day" is:  
Add a little bit of GREEN to your next project!

~~~~~~~~~~~~~~~

November 5, 2010

Purple, Silver & Gold - Sari Ribbon Baby Album

This is a special album cover I created for an etsy order - featuring the layered silk sari ribbons and loopy spine trim. The purchaser wanted this album cover for a 12" x 12" album, for her first baby, and requested purple since she didn't know the gender of the baby yet.
Donna at Field's Fabrics helped me out quite a bit with selecting coordinating fabrics, as I was a little stumped on how to include silver and gold - as I haven't ever really combined the two colors together! She was a huge help to me (I love shopping there!) - and I'm so grateful!!

Here is how it turned out! : )


~ Thank you for looking! ~

September 18, 2010

Color Palette Challenge - Cream, Olive, and Rust

My friend Rosanna asked me to create a special art journal for her friend's birthday. Rosanna already had an art journal I had made using the silk sari ribbon, frayed and sewn in rows in layers with beading - for her friend she wanted something similar but with a completely different color scheme. I gravitate towards bright colors - and a lot of them! - so it was a real creative challenge for me to use a specified set of colors, but it really inspired me to begin thinking more about the colors I don't normally use. The more I worked with this color set, the more I liked it! Plus, it feels very "fall" - and fall is definitely here in Michigan. I'm happy with how this turned out - and I'm already thinking of ways to incorporate these colors into my other pieces - I love the sophisticated effect they have!

I rummaged through my fabrics and supplies, and discovered that I didn't really have very many materials to work with in this color range - I had a LOT of of fun shopping and picking up some fresh new fabrics and beads - here are the supplies I ended up working from. I share these photos because maybe now this color palette will inspire someone else as well! : )


Last but not least, the silk sari ribbons! : )


Here is the finished art journal:

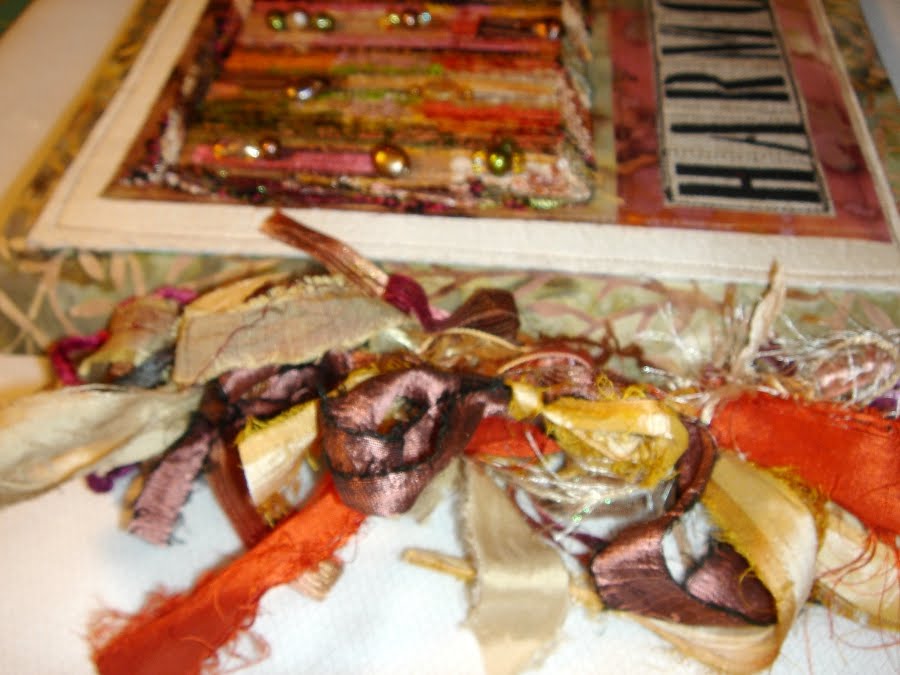
Front Cover - Layered Silk Sari Ribbon stitched in rows, embellished with beading, along with black stamped letters on canvas - all layered onto a colorful batik, then candlelight silk dupioni, and an olive/cream foliage themed batik background.


Ribbons on spine laced through grommets inset in the spine, which not only looks pretty but is functional too as it anchors the inner rings which hold the inside pages.


Close-up view of the silk sari ribbon panel - it was difficult to choose which beads to use, because I love them all! : )


Inside front cover - customized label.


Inside pages - a "variety pack" of special papers, including handmade, vellum, metallic inclusion, botanical inclusion, foiled, stamped, glassine envelopes, and handmade paper.


My art journals are available for custom order at:

~ Embrace the colors of fall! ~

Final Photographs - "Enchanted Forest"

My past few posts have been about an art quilt I have been making for the past couple of months. It is a HUGE triptych form art quilt, with a midnight blue swirly tree (silhouette effect), a sunrise sky, and lots of little "characters" including birds, butterflies, dragonflies, flowers, and even a little frog. It has been an absolute joy to work on this quilt, for my friend in Australia. She is so wonderful - and I wanted this quilt to be amazing for her. A couple of months in the making - this quilt has evolved from a rough crayon sketch to my best piece of work ever - I'm so proud!!
My whole family got involved in the final photography of this quilt - we wanted to capture it fully before I sent it overseas. (Thank you to everyone who helped!!)

Here are the final photographs:

First, here is a photo of the piece hanging above a queen-sized bed, to help see the scale of this quilt - it is very large, measuring a total of 58" wide by 30" tall (divided into two smaller outside pieces and one larger middle piece).


Here is a view of the entire quilt, with a black background:


Last, here are a few detail shots:

(see my previous postings to see how I created the birds!)


(I love how the bottom bird seems to be looking up at the bird on the top branch - reminds me of my daughters somehow ; )

Ground cluster work - created with bits and pieces of green variegated boucle yarn, confetti fabric, fussy-cut commercially printed fabrics (VanGogh's Iris Flowers), all stitched beneath water soluble stabilizer. Once the stabilizer was washed away, I did additional stitching and overstitching, and also used fabric dye pens to highlight and shade areas of color. Very fun technique!!


I'm really pleased with how this turned out - and I'm so happy this piece is going to someone as delightful as my friend in Australia. This project really stretched me creatively and provided a wonderful challenge - I learned a LOT and I just can't wait for her to receive her package in the mail!! : )

September 8, 2010

More progress on an art quilt!

I have been working on an art quilt for my friend Linda in Australia - as seen in my previous post.
We decided to add a groundline, with clusters of grass and foliage with iris flowers and some small pink flowers - and we've added several more birds, butterflies, and even a little hummingbird and frog!
Becuase the initial layer was already complete, I added this new foreground layer by laying on the small fabric pieces, and the cut out blooms (fussy cut from quilting fabric printed with VanGogh's paintings), and adhered by laying water soluble stabilizer, which was then stitched (extremely densely) with clear thread to make sure all of the little pieces were secure. Then I washed away the stabilizer - let the quilt dry, and begain coloring over this layer with some fabric dye markers and touches of Shiva Paint Sticks. I'm so proud of how it has turned out!!
At this point, we just need to finish up the stitching on the frog, lillypads and water plants, as they are not yet secured to the quilt (I'm waiting to see what Linda thinks of them!) - and then do a bit more stitching for outlining and shading on the additional birds, butterflies, and flowers. How many birds can you count? : )
After those are completed, we can put on the backing fabric with hanging sleeves and binding!
I'm so happy with how this is turning out - Linda's initial vision for an "enchanted forest" is coming true!
The next photos will be the *final* photos - I can't wait to share!

Left Side:


Right Side:


Iris Closeup:


Birds and butterflies in upper left side of the quilts - (still needs more stitching):


Closeup of the flowers, bottom left beneath the birds (this is on a seamline, there will be narrow black binding around all 3 pieces of this quilt):


Final photos coming soon! : )

August 26, 2010

Progress on an Art Quilt Triptych

I am pleased to report some progress on my latest project - an art quilt in triptych form with three very large panels. This quilt is for a very special friend of mine, and I wanted it to be perfect! So of course I began struggling with the design...I knew she wanted a large tree that swirled and curved which would spread over the three panels. I decided to work on the "main character" of the scene (the tree!) first, since it would be the largest focus of attention. As you see in a previous post, I roughly sketched in my idea for the tree on batting, just to get the scale and size in my mind. I decided it would be easier to work against a wall instead of on a table, so I taped up large pieces of freezer paper to begin sketching the tree again. It was much easier to work this way, because I could stand back and analyze, then go back to the wall and work again. After almost completely rubbing off the paper side of the freezer paper with my drawing and erasing (LOL!) I finally ended up with the large, swirling tree I had envisioned. I traced over it with black sharpie marker to allow for more contrast for a photograph, as this will be my template. I plan to iron these large pieces onto fabric to use as a template for cutting. I have some gorgeous deep blue variegated silk that drapes beautifully and has a lot of texture already with its shading - this might be perfect for the tree, but we'll see! : )


I've also made progress on the background!! I was up all night one night, happily working on this project - cutting, chopping, sprinkling fabrics...but as I grew more and more tired, I grew more and more frustrated. Nothing seemed to be working - the color combinations for the backgrounds just weren't "playing nice" with each other! I kept scraping up the little pieces and rearranging them - (have you ever tried to scoop up little pieces of fabric off of batting? They simply don't *like* to move!) - but nothing was helping. Either everything seemed too choppy or too boring. Finally I was about to give up for the evening to try again the next night, and I looked out my window. I live on a 3rd floor, and my view of the sky is amazing - there was the most *gorgeous* sunrise I had ever seen. Right in front of my very eyes!! It was so colorful, intense, but somehow calming...I quickly grabbed a piece of scratch paper and some crayons, because since I'm not really gifted when it comes to drawing, I knew I had to just capture the colors and their order vertically in the sky and their scale width-wise...I scribbled and scribbled madly for about 15 minutes before the sunrise completely changed. But I managed to document at least something close to that beautiful scene!! (In retrospect, I should have grabbed my digital camera!!) Anyway - the bottom of the sky looked blueish-purplish, then in the middle there was the softest pink which blended up into the most intense bright orange-pink - then almost gold, on up to orange-yellow, finally topped off with a soft pale yellow. It was really beautiful - and felt like a personalized gift from nature - "Here is your inspiration!"

The photo you see here only shows the chopped up fabrics on batting - this is only the beginning. The tulle layer and then the many many layers of stitching and overstitching will blend them all together into one cohesive piece. But - having this part finished is a huge amount of progress - and just seeing it come this far is inspiring me to work even harder!! : )


I'll be posting more progress soon! : )

August 21, 2010

Stitched & Quilted Bird - Experiment #1

I am currently working on a very large art quilt - a commisioned piece for a wonderful lady in Australia. This will be another of the "Impressionistic Style" art quilts which I really love to create. She wants a forest type scene, with gorgeous birds, and some other "characters" such as dragonflies, toadstools, happy flowers, and a large swirling tree. This will be an extremely large piece (for me), and will be in the form of a triptych or a series of 3 art quilts which will hang side-by-side. The total width will be around 60" and the height will be around 30", so I will have two smaller rectanges on the sides measuring 17" x 30" and one in the center measuring approximately 22" x 30". It is going to turn out to be absolutely amazing  - my Australian friend has such a gift for creative vision!

So far I have done the prep-work for this quilt - researched for possible images, preparing the large pieces of cotton batting fused to backing fabric (for stability), and marking out a 3" x 3" grid on the batting.
Here is a photograph which shows the batting, on which I have sketched out the initial design for the large swirling tree.


I have altered some of the branches since this photo - making them swirl down more on the center panel to allow for a pair of birds to perch. The birds will be Australian Blue Wrens - which are absolutely beautiful!! I haven't come across any images of these birds that I didn't fall in love with, so choosing just one image was pretty difficult - the most difficult part however, was deciding HOW to create the birds for this quilt. I consulted my stack of art quilting books and magazines - and came across my copy of "Quilting Arts" Issue #34.  (I *love* Quilting Arts Magazine!!! Here is a link to their website:  http://www.quiltingarts.com/ )


In this issue, there is a wonderful article by Karin Winter called "Quilted Pet Portraits" - I decided to try creating a bird from several different layered scraps of fabric combined with thread painting, as her how-to article describes.

Here are my "blues" - fabrics and threads! (You'll see I love to collect fabric and thread!!)


Here are the results of my first try - or "Experiment #1" - I love this style!! : ) You'll see my "inspiration" photograph along with the finished bird. This quilted and stitched bird will be cut out and applied as an applique to the larger art quilt later on - the background fabric showing was only used for stability while stitching, and to serve as a foundation to build up the layers of fabric on during the creation process.


It will look much different when it has been cut out and applied to the planned background scene.


A Close-Up photo of all of the stitching:


This one little bird took about 6 hours of cutting, stitching, layering, and stitching again...and again...and again!! I just kept using different variegated threads, filling in areas and going back over lines - adding texture - it was amazingly fun - I really love this style of art quilting.

This art quilt project is so inspiring - I completely love the colors and the scene, the whimsical style of images my friend selected - it has been a joy to work on so far. : )

I'll be posting more photos of this project soon!

July 26, 2010

Impressionistic Art Quilt - "Poppies with Blue Sky"

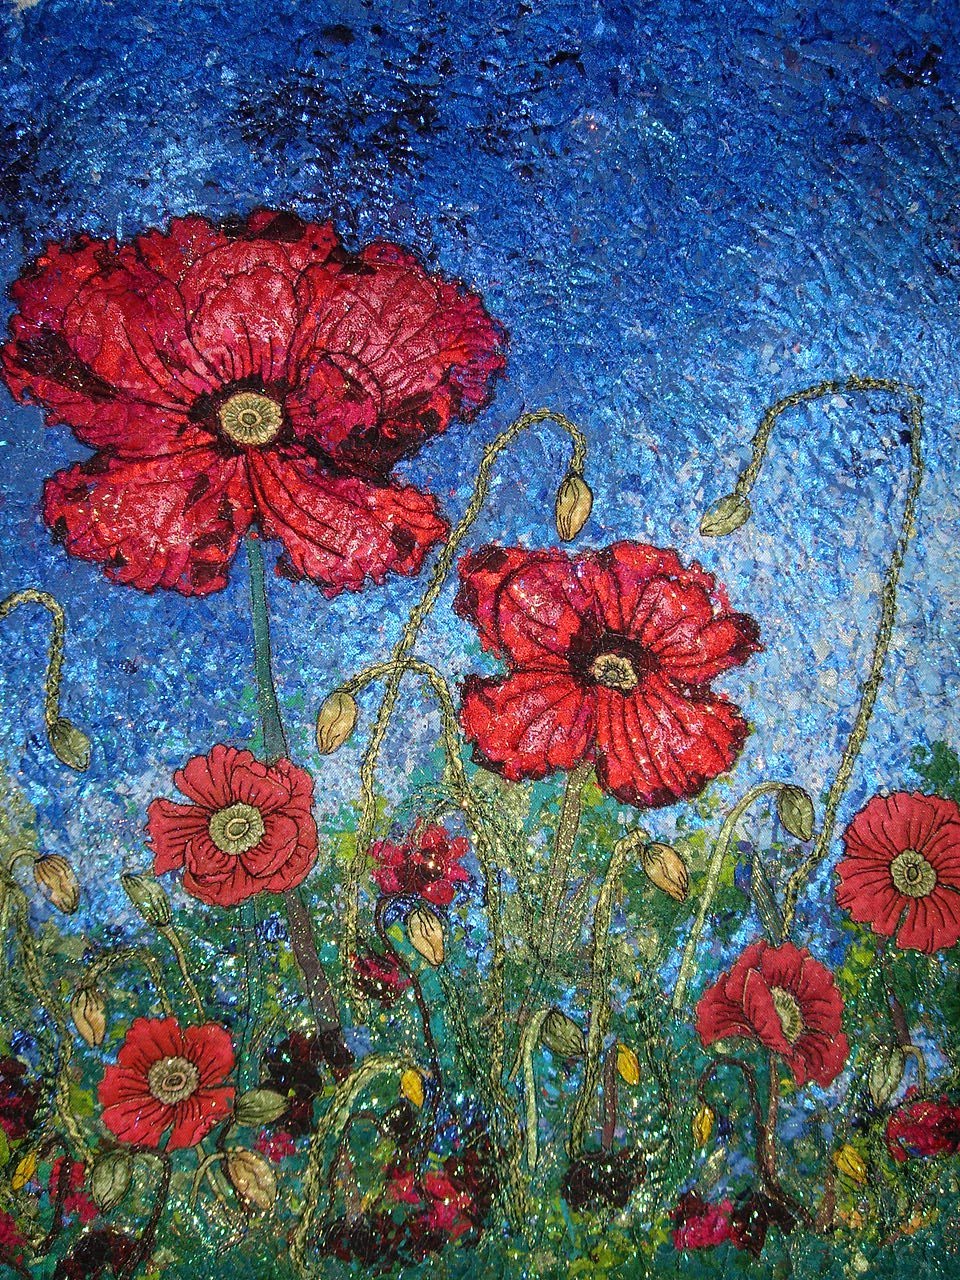
I created another "Impressionistic" style art quilt over the past week. This was a custom art quilt for an order I received via Etsy, and I'm so very happy with the results!! I fussed a bit over the larger poppies, as usually I use fussy-cut fabric from commercially printed fabric for the main in-focus blooms. This stretched me creatively and I tried a few different ideas before finally settling on using the center from the commercially printed fabric and creating my own poppies using large fabric pieces cut into petals, with layers of chopped fabrics on top to help the blooms blend in with the rest of the quilt. On this piece I also did more "thread sketching" than I ever have before - there is an entire spool of black thread in this quilt! I love the effect that the heavy outlining gives and I think I'll do this more in the future.

This piece measures 25" long by 19.5" wide, and is not entirely finished yet - I need to add the binding, hanging sleeve, and a personalized label - but I couldn't wait to post the pictures anyway!! : )

Here is "Poppies with Blue Sky":


Here are some additional detail shots:


The only problem with creating custom orders is having to send them away in the mail!! ; )
Really - I'm so happy I got to create this piece for "Spook" on etsy - it was an absolute delight, and she is so encouraging and has such inspiring ideas. I'm very grateful to have been able to create this for her.
(Thank you!!!)

July 14, 2010

Another Sari Ribbon Pillow!

Here is the new square-shaped sari ribbon pillow, part 2 of the custom etsy order I'm working on.
This one is to go along with the round one (previous post) and still includes aquas/blues/purples for the sari ribbon colors. I did a lot of extra beading on this one because I had so much fun with the colors!!  I like the way the edging around the centerpiece turned out too - I used several different novelty yarns/fibers and twisted them together, and couched them down around the edge with a zig-zag stitch.

Also - on this pillow I added a couple of extra special touches, including sewing another border around the outside edge - although subtle, it gives it better shaping, plus reinforces the overlap on the backside of the pillow a bit more - to allow a bit more tug and pull as it is stuffed with a pillow form. Also, on the overlapping fabric on the back side, I added velcro closure, to make sure that the case will be completely secure.

Here are the photos!! : )


Last, this is how they look together!