Showing posts with label Beads. Show all posts

September 18, 2010

Color Palette Challenge - Cream, Olive, and Rust

My friend Rosanna asked me to create a special art journal for her friend's birthday. Rosanna already had an art journal I had made using the silk sari ribbon, frayed and sewn in rows in layers with beading - for her friend she wanted something similar but with a completely different color scheme. I gravitate towards bright colors - and a lot of them! - so it was a real creative challenge for me to use a specified set of colors, but it really inspired me to begin thinking more about the colors I don't normally use. The more I worked with this color set, the more I liked it! Plus, it feels very "fall" - and fall is definitely here in Michigan. I'm happy with how this turned out - and I'm already thinking of ways to incorporate these colors into my other pieces - I love the sophisticated effect they have!

I rummaged through my fabrics and supplies, and discovered that I didn't really have very many materials to work with in this color range - I had a LOT of of fun shopping and picking up some fresh new fabrics and beads - here are the supplies I ended up working from. I share these photos because maybe now this color palette will inspire someone else as well! : )


Last but not least, the silk sari ribbons! : )


Here is the finished art journal:

Front Cover - Layered Silk Sari Ribbon stitched in rows, embellished with beading, along with black stamped letters on canvas - all layered onto a colorful batik, then candlelight silk dupioni, and an olive/cream foliage themed batik background.


Ribbons on spine laced through grommets inset in the spine, which not only looks pretty but is functional too as it anchors the inner rings which hold the inside pages.

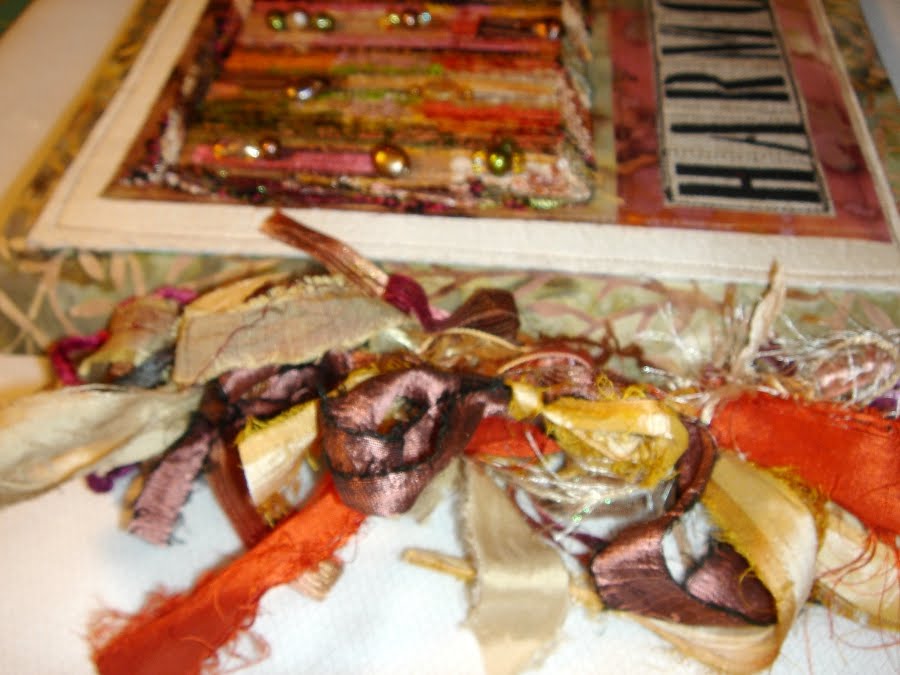

Close-up view of the silk sari ribbon panel - it was difficult to choose which beads to use, because I love them all! : )


Inside front cover - customized label.


Inside pages - a "variety pack" of special papers, including handmade, vellum, metallic inclusion, botanical inclusion, foiled, stamped, glassine envelopes, and handmade paper.


My art journals are available for custom order at:

~ Embrace the colors of fall! ~

July 14, 2010

Another Sari Ribbon Pillow!

Here is the new square-shaped sari ribbon pillow, part 2 of the custom etsy order I'm working on.
This one is to go along with the round one (previous post) and still includes aquas/blues/purples for the sari ribbon colors. I did a lot of extra beading on this one because I had so much fun with the colors!!  I like the way the edging around the centerpiece turned out too - I used several different novelty yarns/fibers and twisted them together, and couched them down around the edge with a zig-zag stitch.

Also - on this pillow I added a couple of extra special touches, including sewing another border around the outside edge - although subtle, it gives it better shaping, plus reinforces the overlap on the backside of the pillow a bit more - to allow a bit more tug and pull as it is stuffed with a pillow form. Also, on the overlapping fabric on the back side, I added velcro closure, to make sure that the case will be completely secure.

Here are the photos!! : )


Last, this is how they look together!

July 12, 2010

Silk Sari Ribbon Pillow - Custom Etsy Order

I met another wonderful person on etsy, who had the vision of using my silk sari ribbon pillow in a new and challenging way - and I'm so pleased with how it turned out! She had purchased new linens for a bedroom in royal blue, and wanted me to use only aquas/blues/purples for the ribbons, keeping the black background.
This wasn't quite the challenge - as these are my favorite colors as well! : )
The challenge was to create a *round* pillow instead of square - and I love how it turned out, so much that I might have to make one for myself!! I'm so happy she had the creativity to envision this pillow with only those colors being used, and round instead of square - not everyone can look at a photo of something and imagine it as something else entirely!! It was very inspiring.

Here is a shot of the pillow which she looked at originally,
or the "before" shot (which is also in another post on my blog):


Now, here are the photographs of the pillow I created, using her ideas!

(Please note: I have difficulty with my camera (or perhaps it is my monitor which has poor color quality), capturing the aquals/teals in any piece I photograph. To me, in person, this pillow has many more aquas and teals...I hope it is visible on other monitors, as I didn't play with the color balance on these photos at all like I usually do.)


This is created using high quality black cotton as the background, which I layered on top of fusible interfacing to help give the front side some shaping for its final form, as well as some sturdiness for sewing on layers of the silk sari ribbon. I had a lot of fun going through all of my skeins of silk sari ribbon to find all of the aquas/blues/purples - and I *love* how they look all layered together!! We opted for no trim, because I felt it would only detract from the design - it is already very textured and layered - a piece of textile art!


I did quite a bit of additional embellishment with hand-beading, and created a center of layered fibers sewn in swirls around the center, with some purple raw silk ribbon cut into a circle and layered for the centerpiece background. I tried using several different large beautiful buttons for the center - I even tried silk flowers, flowers I created with ribbons, layered fabrics, beading, etc - the center was a very tough decision!  I eventually rummaged through all of my embellishments, and found the perfect piece of "bling" - a vintage jewelry piece that was in the shape of a flower, with the beautiful royal blue stones - which would match the color of her bedspread - perfect, if I do say so myself!! : )


Soon I will be posting another pillow similar to this one, except this time square - I'm excited to see how the two pillows will look side by side. I'm sure it's going to be gorgeous!

July 9, 2010

Custom Creation for Etsy - Silk Sari Ribbon Journal - "Passion" Theme

A wonderful, very friendly and inspiring artist contacted me via etsy to create a custom order for her - an art journal that would be used for a round-robin style collaborative piece.

For now I am just going to post photos - however soon I will modify this post to include ALL of the details on how I went about this project. : )

I would love for any of my followers to visit the etsy page (at least!) of the artist who commissioned this art journal - she has amazing, whimsical style artwork!!  Please visit Rosanna's Etsy Shop - and see her website links also - fabulous work!!

Here are the photographs for now (I'll update soon, I promise!!)


Inside front label page, with contact information for the owner of this new journal:

Heavy Textured Watercolor Paper - Cut in varying sizes to allow overlap and texture within the journal:


Colorful Inside Pages - a variety of different types of papers


A Close-up of the Silk Sari Ribbon Textile Art on the front cover of the journal:

A better view of the spine - and the silk ribbon which holds the inside rings in place:


One last photo - a different view of the front:


~ Thank you for looking!! : ) ~

April 11, 2010

Wearable Art ~ Little "Cuff" Fiber Art Bracelets

I have been admiring the work on "Bonheur" on etsy for a long time - fabulous, vintage bits of lace and beads and textiles all gathered into little wearable bundles of art - who couldn't resist such a treat??
So I decided to try it out - a SUPER fun, easy project!! With gorgeous results...


This particular bracelet is nice because it is adjustable, with eyelet and ribbon closure, which also adds another feminine detail - the bow! You can make this as "blingy" as you'd like, or opt for a simpler effect with less beads and/or vintage jewelry pieces. Adjust the size and number of focal flowers, adjust the width of the bracelet to make more of a "glove" effect, or change the color scheme to something more playful - a great way to use up little precious scraps into something wearable! : )

All you need is:
  • Satin or Silk, 2 pieces measuring about 2" x 7" (adjust for the width of bracelet you'd like or length for your own wrist)
  • Vintage bits of lace (in this case, I made it super simple and used lace that was already embroidered and beaded!)
  • If your lace isn't beaded and embellished already, you might want to add little beads and some embroidery thread, even silk ribbon embroidery would work beautifully - whatever embellishing you are comfortable with!
  • For the focal flower - Several circles of fabric that get smaller and smaller in size, largest measuring 2" in diameter, suggested fabrics: tulle, organza, silk, or satin
  • Vintage Jewelry Piece, for adorning the center of the focal flower (or even just some pretty beads would work here)
  • Eyelets and eyelet setting tool (I used 3/16" flower eyelets)
  • Thread (I used ultra strong "Silamide" thread)
  • Needle
Instructions:
  1. Make your "base" bracelet. Simply sew the long sides of your fabric, right sides together, and then sew one short end. Turn inside out, then tuck in the raw edges of the other short end, and whipstitch closed for a finished edge. Following directions on eyelet package, add eyelets to each end.
  2. Embellish the base of your bracelet - get creative! Use bits of lace, beading, hand-embroidery, ribbon embroidery, small appliques, or go for a "tattered" look and apply all sorts of fabric scraps in an artful arrangement onto your base. I like to use silamide thread, because I know it won't ever fall apart once I'm wearing the bracelet.
  3. Create focal flowers - starting with the largest of your circles, start stacking them on top of each other, from largest size down to smallest size, until you have the desired "poofiness" in your flower. A *great* way to seal the edges and create curl and texture on the edges of your petals is to lightly "kiss" a candle flame with the very edges of the fabric - ***Please be extremely careful while doing this - please have adult supervision if you are not an adult*** - this works especially well with polyester tulle and organza layers. It singes and sears the edges closed for a no-fray flower, and adds texture, almost like a real flower!
  4. Tack your layers of fabrics together with a few anchoring stitches at the center of the stacked circles.
  5. Sew your focal flower(s) onto the bracelet, adding extra stitches around the edge of the bottom most layer, so it stays flat against the bracelet while the bracelet is curved around your wrist.
  6. Add some "bling" to the centers of your flowers, adorn them! They need to be "crowned!" Use antique jewelry parts and pieces, or a cluster of hand-sewn beads.
  7. Finish your bracelet off with some satin or organza ribbon through the eyelets, and tie it on, and be admired!! : )

Back of the bracelet, with ribbon tied:


A better view of the eyelets:


I will be posting more variations on this bracelet soon - there are all sorts of ways to create these, for all sorts of different effects - enjoy!! : )

March 9, 2010

Anthropologie Statement Bib Necklace with Silk Ribbon Flowers

I have been inspired by the "Anthropologie" style necklaces, AKA "Bib Necklaces" or "Statement Necklaces" as I've been browsing around on etsy. So I decided to try making my own! It turned out pretty OK for a first attempt - I heart it so much I could barely stand to list it! ; ) I'll post a tutorial soon.


The flowers are made from 100% silk sari ribbon - which I'm completely obsessed with - all except the center flower, which is a layered style flower made from all different types of fabrics stacked on top of each other. The center flower also has a miniature antique/vintage pearl brooch sewn on - I love upcycling vintage jewelry. The necklace portion is made from two different old necklaces that I pieced together and hand-stitched down onto the "bib" portion, so it has a double-strand effect.

Very fun! Very easy! Make one!! (for yourself!)

Find the Silk Sari Ribbon here:  http://www.etsy.com/shop/NorthcottWilson

Find the necklace at my etsy shop, or something else crafty I've made, here:   http://www.etsy.com/shop/heathers3stars

February 9, 2010

Paper Beads with UTEE

I cut up some strips of paper, rolled them around a skewer gluing along the way with gel medium (thin layer), then rolled around on a clear embossing ink pad, then dipped in UTEE (Ultra-thick embossing enamel - available at Hobby Lobby or Michael's in the scrapbooking section). Then heat with a heat gun, watch them turn glossy and beautiful, then maybe dip them a few more times if you want more of a high-gloss finish - then you can sprinkle on some Pearl-Ex, some fine mica, some tiny beads, wrap with fibers, experiment and have fun with what you have - anything goes!!

These are a few I took a bit further - I plan to use these as charms on journals or jewelry, so I added beads to each end and put them on a metal head pin and wrapped additional wire and created a loop for attaching them more easily to things later.